While it’s important to know your body measurements for different reasons, it is vital to know how to get your body measurements correctly.
You may need to take your body measurements to order clothing online, to keep track of your progress with that weight-loss program or simply to update your memory from time to time as to what you weigh or how you measure.
Here you will learn not only how to get your body measurements but how and where to place the tape measure so you don’t get an inaccurate measurement, which happens to the best of us.
What To Expect In This Article?
Before Getting Started
- Pick a time that is convenient for you so you don’t have to rush. The best time to take measurements is earlier in the morning (anytime before lunch). This is the time when you will have no post-meal bloating.
- Make sure you’re wearing something comfortable as well as snugs such as a basic t-shirt and well-fitted pants.
- While many people think they can get their own measurements accurately. It’s BEST to ask a friend to help you with an accurate reading.
- For chest, waist, and hips especially; make sure the tape measure is in level and not too tight or too loose. Don’t press the tape measure too much against your skin.
- Stand upright and look straight ahead. Breathe normally. NEVER ‘suck in’ or stick out your tummy, as this will not reflect your true body measurements.
- Tie a cord around your natural waist that will serve as a stable reference level. Be sure, that the chord is parallel to the floor and doesn’t move during the process.
- Write the measurements down, even though you think you will remember each measurement.
You will Need:
- A non-stretchable cloth tape measure, or if you’re hard-pressed for time or don’t have one at the moment, you can download one here.
- A pencil and paper to take notes
- A chord or elastic
- An assistant, for taking measurements easily and accurately
- A full-length mirror (if you’re taking measurements on your own)
How to Measure Chest, Waist, Hips and More…
To simplify the process of getting your body measurements, that many find a tedious job, we have broken down this process into two parts.
The first part isn’t only helpful for custom jackets, but it also covers measurement details that will help with custom garments such as shirts, jackets and coats, blouses, slacks, ssportswear-inspired garments, unique period pieces etc.
All in all, some pretty helpful measurements. Let’s get started:
- Chest or Bust Measurement
- How to Measure your Natural Waist
- How to Get your Lower Waist (Midway) Measurement
- How to Measure Hips
- How To Measure Shoulders
- How To Measure Sleeves Length
- How To Take Neck Measurement
- How To Measure Centre Back Length (Jacket)
1. Chest or Bust Measurement
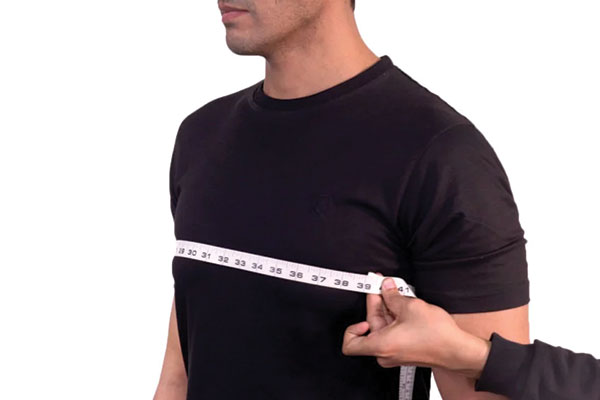
Measure the circumference of your chest by placing the beginning of the tape measure on one side of your chest and going around under your armpits.
Make sure the tape measure is covering the fullest part of the chest for an accurate chest measurement.
2. How to Measure your Natural Waist
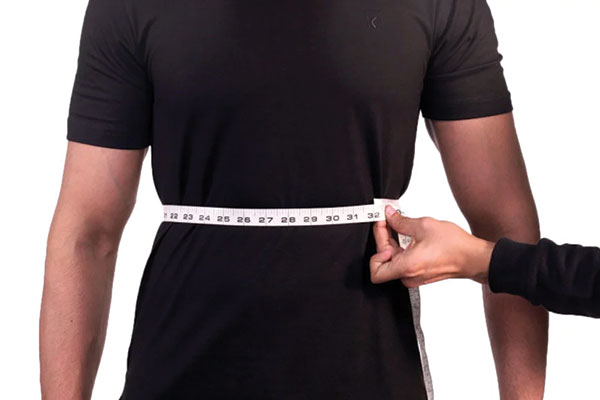
Measure the circumference of your waist by placing the tape measure as you would a belt.
Natural waistline is the narrowest area of the waist and is usually an inch or two above the belly button. It can also be located easily by bending towards one side.
3. How to Get your Lower Waist (Midway) Measurement
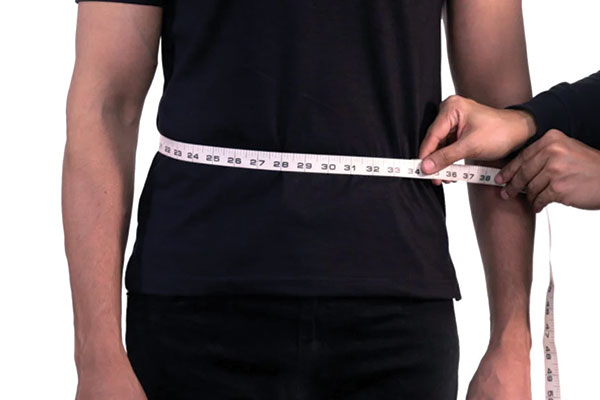
On the other hand, lower waist unlike the natural waist, is the widest part of the waist and is usually at the belly button or just below.
Placing the tape measure at the widest part of your waist will give you your lower waist or midway measurement.
4. How to Measure Hips
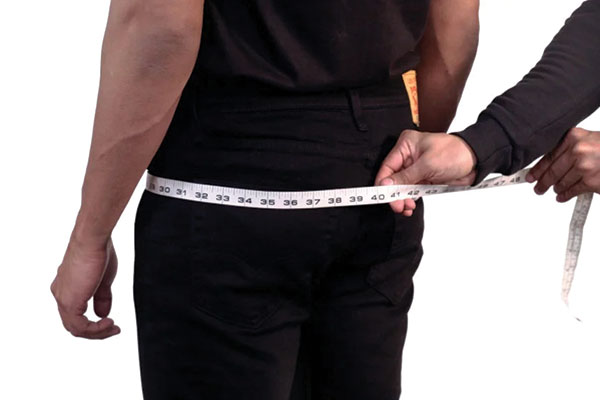
Start by measuring at the widest point of your hips. Place the tape measure at one side of your hip and wrap it around (circumference). Make sure that the tape measure covers your butt.
5. How To Measure Shoulders
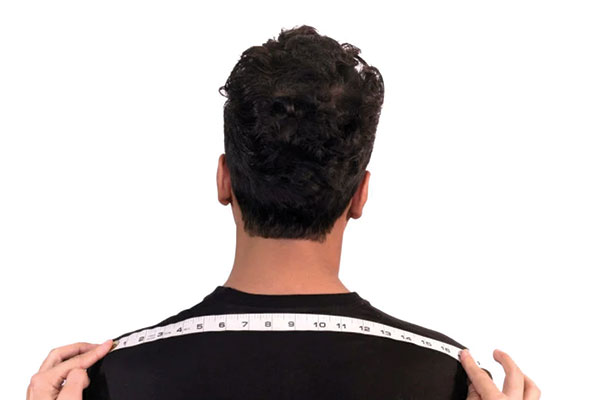
Place the tape on “top” of the shoulders. Measure from the edge of the left shoulder across the back of the neck continuing to the edge of the right shoulder.
6. How To Measure Sleeves Length
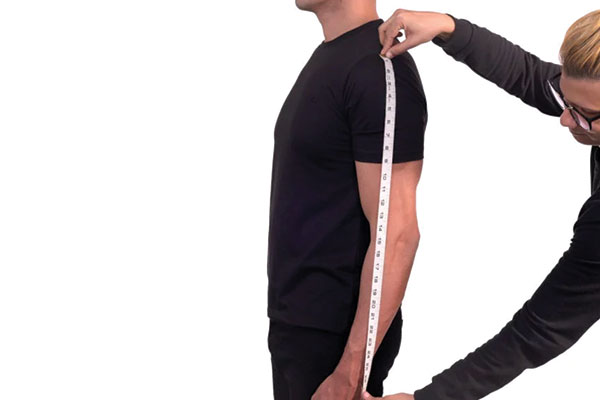
Place the tape-measure at the edge of your shoulder and guide it down your arm, finishing at the wrist or your desired length.
7. How To Take Neck Measurement
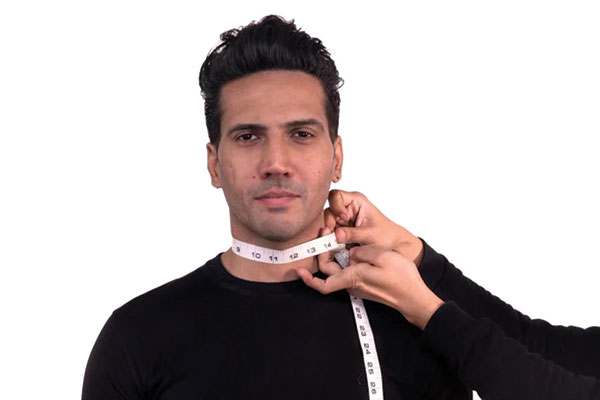
By placing the tape-measure around the circumference of your neck and placing your index and middle finger below the tape-measure to allow some ease, will give you your neck measurement.
The use of fingers below the tape-measure differs from person to person as some use one finger (index) while others use two.
8. How To Measure Centre Back Length (Jacket)
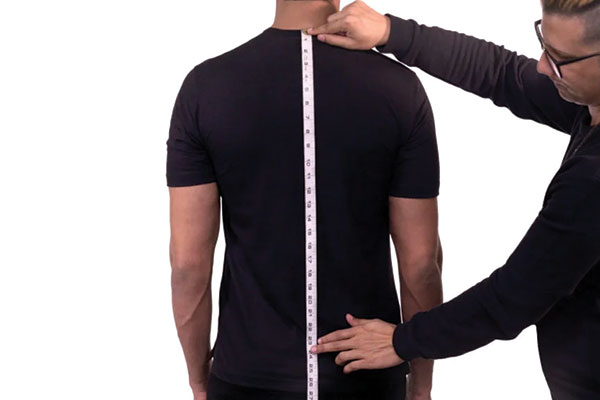
Place the tape at the center back of your neck or shoulder-blade and guide the tape vertically to the center-point of your waist or to your required length.
Getting your Measurements in Detail
This second part will help you in getting additional measurements that will help you in getting a better overall fit. This is for the people who like super-fit and tight clothing or are very conscious about the fitting.
Either way, it’s always good to keep a note of these measurements, just in case you need them at any given moment. Here goes:
- Upper arm (biceps)
- Wrist
- Inseam Length
- Ankle
- Calf
- Thigh
1. How to Measure your Upper arm
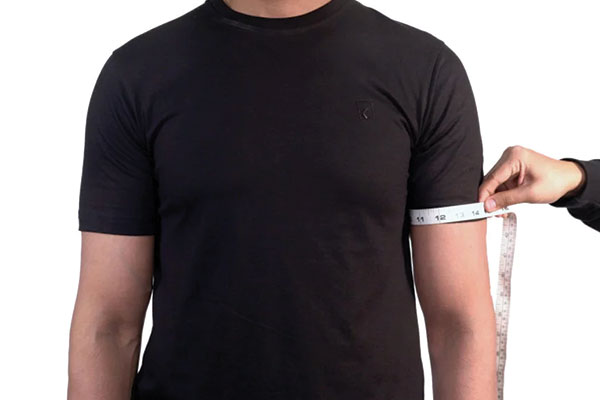
Place the tape measure on one side of the fullest part of your upper arm. Usually, this is the bicep-triceps area. Now guide the tape measure around the circumference of your upper arm and make a note of the measurement.
2. Wrist Measurement
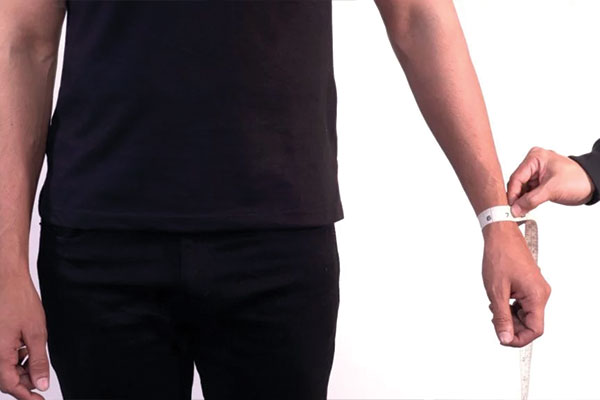
For your wrist measurement, place the tape-measure around the circumference of your wrist. Make a note of the reading. If required, you can do the same for an above the wrist reading as well.
3. How to take Pants In-seam Measurement
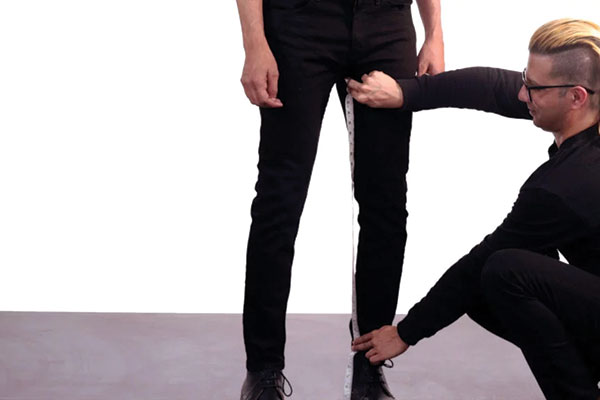
By placing the tape measure on the underside of your crotch and guiding the tape down to your ankle, will give you your inseam measurement.
You can also get this measurement by using a pant that fits you well. Lay the garment out and measure the inseam as mentioned above.
Although the inseam measurement is enough, sometimes an outer-seam measurement is required.
In this case, you will ask your friend to place the tape-measure on the outer side of your pant leg and make a note of the measurement between your waist to your ankle. Or wherever the garment is to be worn.
4. Ankle Measurement
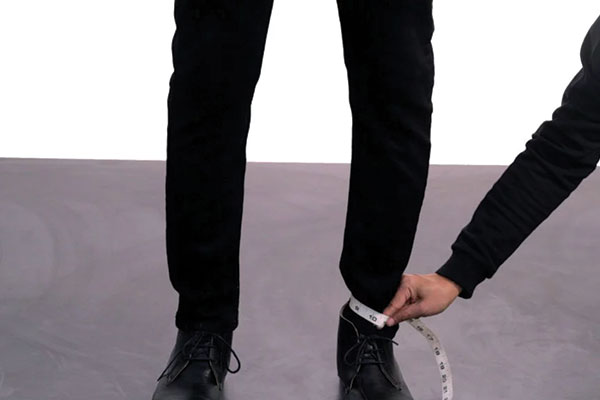
By placing the tape measure around the circumference of your ankles, right above the ankle bone; you will get your ankle measurement.
5. Calf Measurement
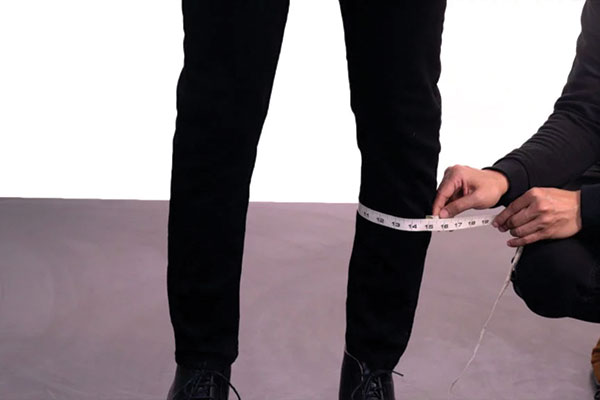
Place the measuring tape around the circumference of your calf to get your calf measurements. This is the area centered between your knee-cap and ankles.
6. Thigh Measurement
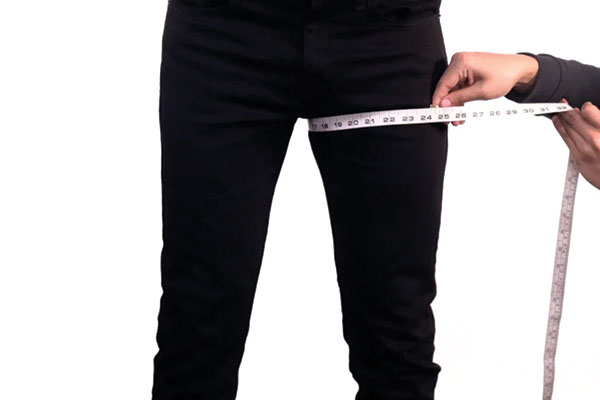
By placing the tape measure around the circumference of the fullest part of your upper leg, will give you your thigh measurement.
Summing it all up…
So here we are, at the end of this post. A step by step guide on how to get your body measurements in the simplest way possible.
Some people often get confused with taking body measurements for various reasons. For instance; taking body measurements vs taking measurements for a jacket.
While there are many points that are common between the two, you will find a few differences mainly concerning the details that you will find in taking body measurements vs a more precise and often times, extract of this information found in measuring for a jacket or any other type of apparel.



Excellent directions